Conditional Formatting in Cognos Analytics (Advanced & Basic)

Abstract
An overview of the Conditional Formatting feature that is part of Cognos Analytics, and to show examples of how it can be leveraged to improve the user experience of a report.
Assumptions:
The user knows how to log in to Cognos Analytics
The user has the capabilities assignments necessary in Cognos Analytics to use report authoring
The user knows the name and location of the package or data module that is available for them to author and has adequate knowledge of this data source
Introduction
Once you have started honing your report authoring skills in Cognos Analytics, you may want to take the next step in your authoring… and customizing the output using Conditional Formatting is one of the ways you can do this. As implied by its name, Conditional Formatting allows the user to apply formatting only when a certain condition is met. This article will introduce you to the tool and its concepts in hopes to make it a useful part of your report authoring.
When to/Why use Conditional Formatting
Almost every object that can be used in a report can have Conditional Formatting applied to it… the exceptions are few, with Singletons, Custom Controls not having this feature. The most typical use for Conditional Formatting is probably the Red/Yellow/Green formatting of values to indicate bad/fair/good performance, but the usefulness of Conditional Formatting extends beyond this example.
I have used Conditional Formatting most recently to hide rows/columns of a Crosstab if a certain condition is met/not met, or similarly, to hide prompt controls. Another good use is styling within multi-dimensional authoring (such as a TM1 cube) where multiple levels of a hierarchy are being rendered.
The Basics
There are 2 types of Conditional Formats… Regular and Advanced. Regular are set up using an existing data item to check for a value, being within a range, less than, greater than, etc. Advanced are more free-form in nature, using Report Expression (sometimes called Layout Calculations).
Styles can be managed from a single location… click the 3 dots menu and select Manage Conditional Styles:


Here is an example of a Numeric Range definition (not advanced):
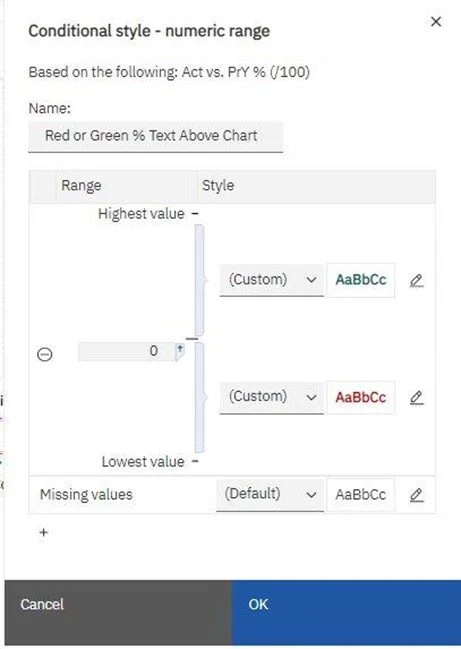
In this example, there is only 1 pre-defined value, 0… if more values were added, we would have more styles to define. If the value is greater than 0 the font is colored Green as shown, or Red if less than 0. This is the most basic conditional style, yet very useful for enhancing your report.
This next example is an Advanced Condition Style that uses a Parameter value… and if the value is not found, the style applied is Box Type = none, essentially hiding whatever uses this Conditional Style.

This Conditional Style is a simple advance style… used to either hide rows or columns in a crosstab, or entire objects, such as prompt controls, etc.
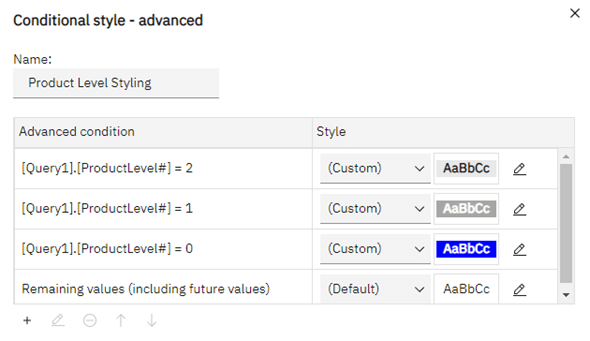
And this last example is styling based on the level of a hierarchy… this is an advanced Conditional Style used to style rows of a Crosstab based on what level. Level 0 is the top, so it’s getting the Blue with white text. As the level goes higher, the shading changes, lighter as we go until the default is reached.

As you can see, based on what level number is found, 4 different styles can be applied. This really helps in creating consistent looking/styled reports in a Dimensional Authoring environment.
The style for each condition is edited via clicking the pencil icon at the far right in both the regular and advanced Conditional Style editors.
Using/Applying a Conditional Style
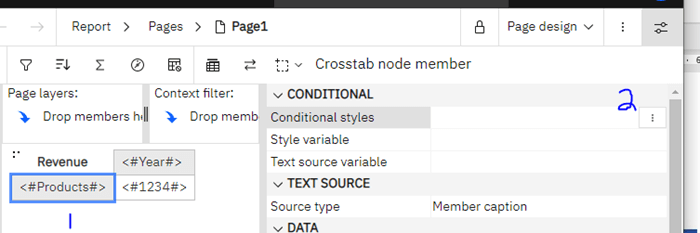
If you don’t already have your styles created, or if you do, the process to assign one to an object is the same. Select the object you wish to apply the style to and at the top of the Properties, you will see the Conditional Styling property… click its edit button.
You will get this dialog:
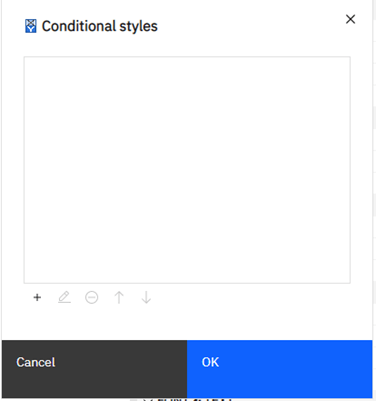
If you have already created styles, you will see them and can select them, or in the case above, there are no styles created yet, so I would need to click the Add + button at the lower left.
You will get the choice to pick regular or Advanced… choose what is appropriate for your application. In my example, I am going to style the rows of a multi-dimensional crosstab based on Product, so I will need to click Advanced.

In the resulting dialog, you create the condition(s) you require, set up the style for each, and then apply it to the object.
Again, here is my setup for the Product hierarchy:
Once I click OK to save, and select, once back you will see the Style added to the property:

Note for this I added a property to the row edge that retrieves the Level Number… here is that expression:
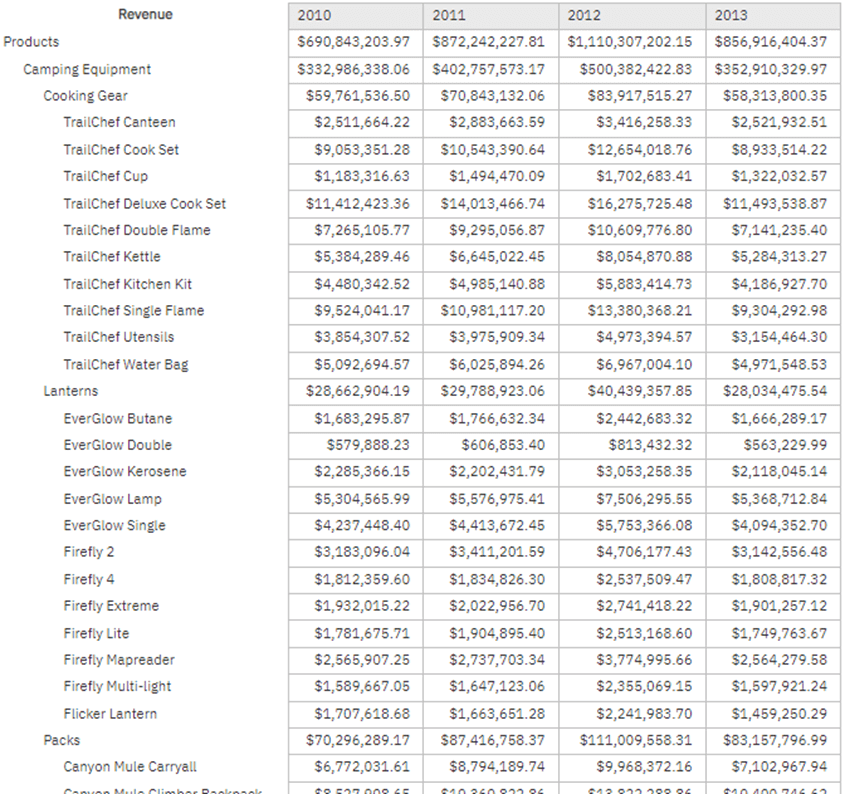
roleValue('_levelNumber',currentMember([Sales (analysis)].[Products].[Products])) And when we run the report, we’ll now see our fancy row-level styling:

Here is the same report with the conditional formatting removed:
Next Steps
We hope you found this article helpful! If you need help with reporting or just want to talk shop, reach out to us!
Be sure to subscribe to our newsletter to have PMsquare original articles, updates, and insights delivered directly to your inbox.
